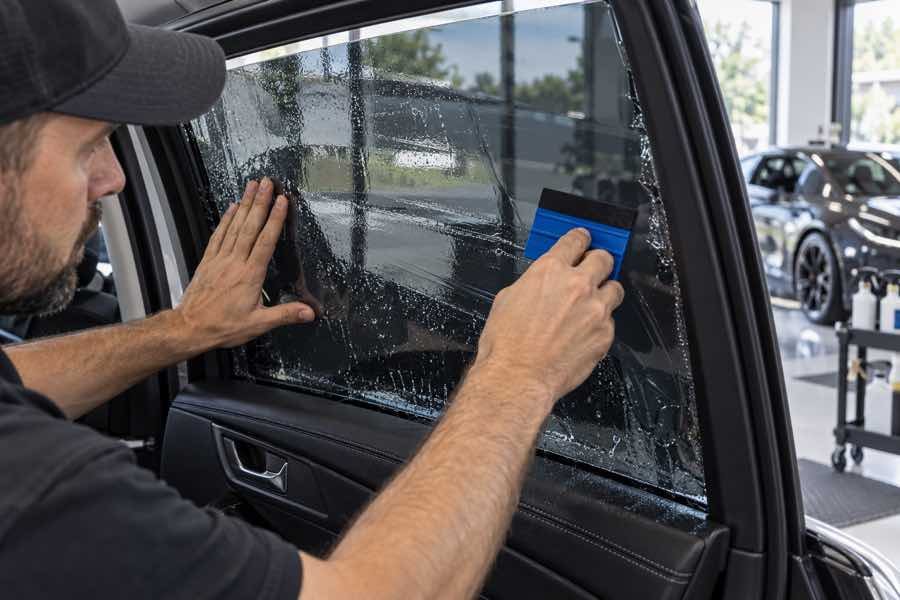
Learning how to tint car windows can save money, but a clean, long-lasting result takes careful preparation and practice. A pre-cut kit on a flat side window is a more manageable first project. Curved rear glass, dust-free preparation, precise fit, and avoiding scratches are much harder. If you want a consistent finish or a warranty, compare professional quotes before buying film.
Before you start: Check the current tint rules for your location and vehicle, including any limits by window. Film marked with a VLT percentage does not guarantee the same finished VLT on your car because the factory glass also affects the final result. Follow the film maker’s instructions for the exact product.
What you need to tint car windows
- Automotive window film suited to the vehicle and intended window
- A vehicle-specific pre-cut kit, especially for a first installation
- Application or slip solution specified by the film maker
- A clean spray bottle, soft squeegee, and lint-free microfiber towels
- A plastic scraper or approved glass-cleaning tool for prep
- Bright lighting and a clean, sheltered workspace
Pre-cut kits can reduce measuring and trimming mistakes. If you buy a roll, you will need to form and cut patterns accurately; cutting directly against vehicle glass or trim can cause permanent scratches or damage. Avoid blades near rear-window defroster and antenna lines.
DIY tinting vs. hiring a professional
| Project | DIY considerations | Why a shop may be better |
|---|---|---|
| Pre-cut side-window kit | A reasonable first project if you can keep the glass and film clean and follow the product instructions. | A shop can provide a cleaner finish, confirm the product and VLT, and back the work with its stated warranty. |
| Roll film cut by hand | Requires accurate patterning and safe trimming. Mistakes may waste film or damage glass and trim. | Installers have patterning tools and experience fitting different window shapes. |
| Curved rear window | Heat-forming a large sheet evenly is difficult; defroster wires add risk. | A professional can form the film for the curve and work around the defroster and antenna lines. |
How to tint a car window: general steps
- Check the rules and choose the film. Confirm the permitted tint for each window and verify the finished VLT with the installer or film maker. Choose automotive film and review its warranty and installation directions.
- Prepare a clean work area. Work out of wind and direct dust. Wash your hands, gather supplies, and cover door panels and electronics to protect them from application solution.
- Clean the glass thoroughly. Remove dust, grease, and residue from the inside surface and edges. Rinse and dry as directed by the film instructions. Small specks trapped under film can remain visible.
- Check the fit before peeling the liner. Confirm which side faces the glass and compare the pre-cut film with the window. Keep the liner in place until you are ready to apply.
- Wet the glass and film as instructed. Use the specified application solution. Keep fingers and the adhesive side clean; contamination can create visible bumps.
- Position the film carefully. Place it on the glass and adjust before it starts to tack. Work from the top down and keep the film from touching dusty trim.
- Squeegee gradually. Use light, even passes from the center toward the edges to push out solution and air. Use the squeegee and technique recommended for that film. Avoid catching or creasing the edge.
- Inspect and allow it to cure. Check edges and remaining moisture without lifting the film. Keep the windows closed and follow the product’s cure and care instructions before cleaning or rolling them down.
This is an overview, not a substitute for the instructions supplied with the film. The 3M automotive window film installation manual describes detailed preparation, patterning, solution, positioning, and squeegee steps for its products and procedures.
Why the rear window is difficult
Rear windshields are curved and may have embedded defroster and antenna lines. Large sheets of film usually need to be shaped to match the curve. Uneven shrinking can leave fingers, creases, or gaps; sharp tools can damage glass or wiring. For most first-time installers, the rear window is a good reason to choose a professional.
Common DIY window tint mistakes
- Skipping a legal check: Film shade alone does not tell you whether a finished window meets the rule for your vehicle.
- Working in a dusty or windy place: Dust can become trapped under the film and show as specks.
- Peeling the liner too early: Exposed adhesive can collect lint, hair, and fingerprints.
- Using the wrong solution or cleaner: Follow the film maker’s mix and care instructions; products vary.
- Cutting against glass: A slip can scratch glass, damage seals, or cut a defroster line.
- Rolling down the window too soon: The film needs time to bond. Follow the installer or manufacturer’s waiting period.
Is it cheaper to tint your own car windows?
The film kit may cost less than a professional installation, but the total cost depends on the film, tool quality, number of windows, and whether you need replacement film after a mistake. A shop quote may include film, labor, removal of old tint, cleanup, and a written warranty. Compare the same vehicle coverage and film series before deciding.
If you are considering DIY, compare pre-cut automotive window tint kits and confirm the kit fits your exact year, make, and model. Some links in this article are affiliate links. As an Amazon Associate, Window Tint Locator earns from qualifying purchases.
Want a professional installation? Browse the Window Tint Locator listings and compare quotes for the same film series, shade, window coverage, and warranty.
Leave a Reply
You must be logged in to post a comment.